Dart 从零开始编写应用程序 (中)
优雅处理错误 Handle errors gracefully
In this chapter, you will improve the robustness of your
command_runnerpackage by implementing error handling. You'll create a custom exception class and add error handling to theCommandRunnerto gracefully manage errors that may occur during command execution.
在本章节,你需要给command_runner包添加异常处理以增强程序鲁棒性 。你需要创建自定义异常类,并为CommandRunner类添加异常处理,以优雅处理指令执行时可能发生的错误
编写自定义ArgumentException类 Create a custom ArgumentException
First, define a custom exception class called
ArgumentExceptionto represent errors related to command-line arguments.
Create the file
command_runner/lib/src/exceptions.dart. This file will contain the definition for yourArgumentExceptionclass.
Define a class called
ArgumentExceptionthatextendsFormatException.
class ArgumentException extends FormatException {
  /// The command that was parsed before discovering the error.
  ///
  /// This will be empty if the error was on the root parser.
  final String? command;

  /// The name of the argument that was being parsed when the error was
  /// discovered.
  final String? argumentName;

  ArgumentException(
    super.message, [
    this.command,
    this.argumentName,
    super.source,
    super.offset,
  ]);

  @override
  String toString() {
    return 'ArgumentException: $message';
  }
}
This class extends
FormatException, which is a built-in Dart exception class. It includes additional properties to store the command and argument name associated with the error. This provides more context when handling the exception.
command: The command that was being processed when the exception occurred.argumentName: The name of the argument that caused the exception.
在CommandRunner类里处理异常 Implement error handling in CommandRunner
Next, update the
CommandRunnerclass to handle potential errors gracefully. This involves adding an error-handling callback, usingtry/catchto manage exceptions, and throwing your newArgumentExceptionwhen the user provides bad input.
Add the necessary imports.
Incommand_runner/lib/src/command_runner_base.dart, add imports fordart:async(to useFutureOr) and your newexceptions.dartfile.
import 'dart:async'; // Add this line
import 'dart:collection';
import 'dart:io';

import 'arguments.dart';
import 'exceptions.dart'; // Add this line
Add an
onErrorcallback to theCommandRunner.
Modify the CommandRunner to accept an optionalonErrorfunction in its constructor. This will allow the user of your package to define their own error-handling logic.
class CommandRunner {
  // Add a constructor that accepts the optional callback.
  CommandRunner({this.onError});

  final Map<String, Command> _commands = <String, Command>{};

  UnmodifiableSetView<Command> get commands =>
      UnmodifiableSetView<Command>(<Command>{..._commands.values});

  // Define the onError property.
  FutureOr<void> Function(Object)? onError;

  // The rest of the class implementation...
}
This change introduces a nullable
onErrorproperty. TheFutureOr<void> Function(Object)?type means it's a function that takes anObjectand returns aFutureor nothing, and it might be null.
这次改动引入了一个可空的onError属性。FutureOr<void> Function(Object)?类型表示一个接受Object参数、返回Future对象(或不返回)的函数,并且它可以为空
Update the run method to use
try/catch.
Wrap the logic inside the run method in atry/catchblock. If an exception occurs, this block will "catch" it and either pass it to theonErrorcallback or rethrow it if no callback was provided.rethrowpreserves the original error and stack trace.
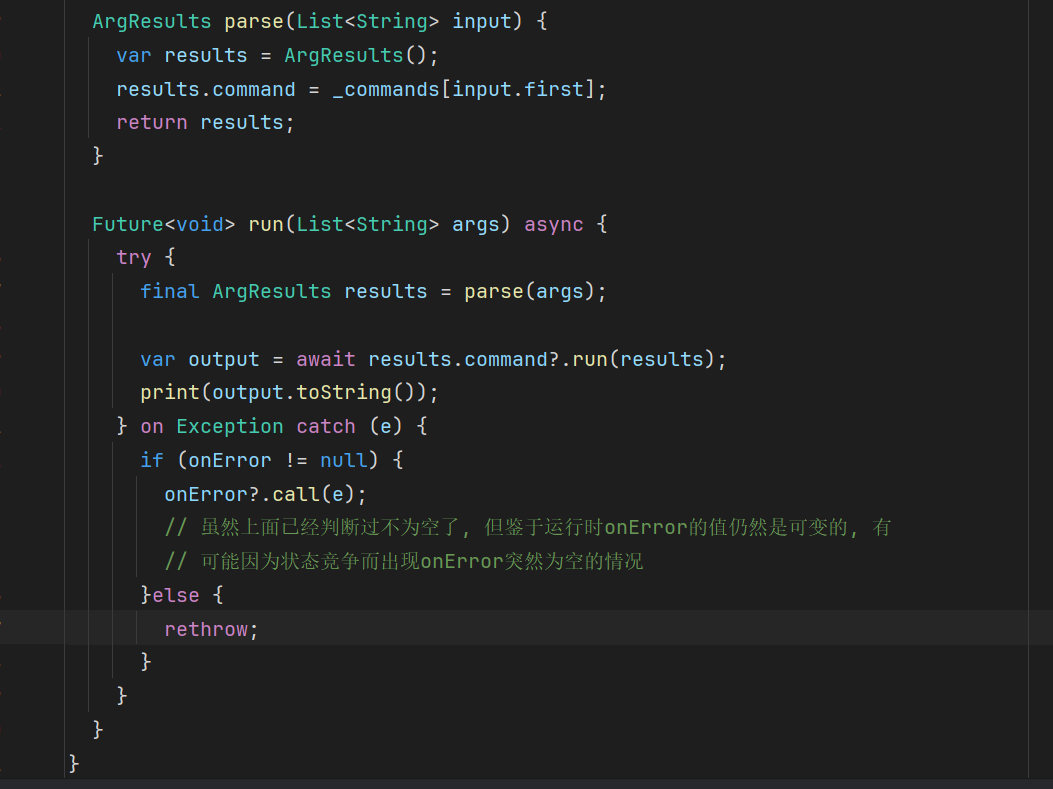
Future<void> run(List<String> input) async {
  // [Step 6 update] try/catch added
  try {
    final ArgResults results = parse(input);
    if (results.command != null) {
      Object? output = await results.command!.run(results);
      print(output.toString());
    }
  } on Exception catch (exception) {
    if (onError != null) {
      onError!(exception);
    } else {
      rethrow;
    }
  }
}
不使用 Null assertion ! 的版本
Add validation to the
parsemethod.
Finally, replace the existingparsemethod incommand_runner_base.dartwith the following updated version. This new version is much more robust. It's filled with checks that will throw your customArgumentExceptionwhenever it detects invalid user input.
// [Step 6 update] This method is replaced entirely.
ArgResults parse(List<String> input) {
  ArgResults results = ArgResults();
  if (input.isEmpty) return results;

  // Throw an exception if the command is not recognized.
  if (_commands.containsKey(input.first)) {
    results.command = _commands[input.first];
    input = input.sublist(1);
  } else {
    throw ArgumentException(
      'The first word of input must be a command.',
      null,
      input.first,
    );
  }

  // Throw an exception if multiple commands are provided.
  if (results.command != null &&
      input.isNotEmpty &&
      _commands.containsKey(input.first)) {
    throw ArgumentException(
      'Input can only contain one command. Got ${input.first} and ${results.command!.name}',
      null,
      input.first,
    );
  }

  // Section: Handle options, including flags.
  Map<Option, Object?> inputOptions = {};
  int i = 0;
  while (i < input.length) {
    if (input[i].startsWith('-')) {
      var base = _removeDash(input[i]);
      // Throw an exception if an option is not recognized for the given command.
      var option = results.command!.options.firstWhere(
        (option) => option.name == base || option.abbr == base,
        orElse: () {
          throw ArgumentException(
            'Unknown option ${input[i]}',
            results.command!.name,
            input[i],
          );
        },
      );

      if (option.type == OptionType.flag) {
        inputOptions[option] = true;
        i++;
        continue;
      }

      if (option.type == OptionType.option) {
        // Throw an exception if an option requires an argument but none is given.
        if (i + 1 >= input.length) {
          throw ArgumentException(
            'Option ${option.name} requires an argument',
            results.command!.name,
            option.name,
          );
        }
        if (input[i + 1].startsWith('-')) {
          throw ArgumentException(
            'Option ${option.name} requires an argument, but got another option ${input[i + 1]}',
            results.command!.name,
            option.name,
          );
        }
        var arg = input[i + 1];
        inputOptions[option] = arg;
        i++;
      }
    } else {
      // Throw an exception if more than one positional argument is provided.
      if (results.commandArg != null && results.commandArg!.isNotEmpty) {
        throw ArgumentException(
          'Commands can only have up to one argument.',
          results.command!.name,
          input[i],
        );
      }
      results.commandArg = input[i];
    }
    i++;
  }
  results.options = inputOptions;

  return results;
}

String _removeDash(String input) {
  if (input.startsWith('--')) {
    return input.substring(2);
  }
  if (input.startsWith('-')) {
    return input.substring(1);
  }
  return input;
}
This updated parse method now actively defends against bad input. Specifically, the new throw statements handle several common error cases:
- Unknown commands: The first
if/elseblock ensures the first argument is a valid command. - Multiple commands: It checks that the user hasn't tried to run more than one command at a time.
- Unknown options: The
orElseparameter withinfirstWherenow throws an exception if a user provides a flag or option (like--foo) that hasn't been defined for that command. - Missing option values: It ensures that an option (like
--output) is followed by a value and not another option or the end of the input. - Too many arguments: It enforces a rule that commands can only have one positional argument.
更新cli.dart,使用最新的异常处理 Update cli.dart to use the new error handling
Modify
cli/bin/cli.dartto use the new error handling inCommandRunner.
- Open the
cli/bin/cli.dartfile.- Update the
mainfunction to pass in anonErrorfunction to theCommandRunner:
import 'package:command_runner/command_runner.dart';

const version = '0.0.1';

void main(List<String> arguments) {
  // [Step 6 update] Add onError method
  var commandRunner = CommandRunner(
    onError: (Object error) {
      if (error is Error) {
        throw error;
      }
      if (error is Exception) {
        print(error);
      }
    },
  )..addCommand(HelpCommand());
  commandRunner.run(arguments);
}
This code passes in an
onErrorcallback function to theCommandRunnerconstructor. If an error occurs during the execution of a command, theonErrorcallback function is called with the error object. The callback checks whether the error is anErroror anException. If it's anError, it's rethrown. If it's anException, it's printed to the console.
更新导出声明 Update command_runner library exports
Make
ArgumentExceptionavailable to thecommand_runnerlibrary.
- Open
command_runner/lib/command_runner.dart, and add the following exports:
/// Support for doing something awesome.
///
/// More dartdocs go here.
library;

export 'src/arguments.dart';
export 'src/command_runner_base.dart';
export 'src/help_command.dart';
export 'src/exceptions.dart'; // Add this line

// TODO: Export any libraries intended for clients of this package.
测试新的异常处理逻辑
dart run bin/cli.dart invalid_command
课后练习
你正在写一个处理用户输入的函数,请问当输入无效时,处理错误的最佳实践是什么
You're writing a function that parses user input. If the input is invalid, what's the best way to signal this to the calling code?
Throw an exception describing what went wrong.Throwing an exception immediately stops the invalid code path, provides a clear error message, and forces the caller to handle the error explicitly.
throw和rethow的区别是什么
What's the difference between
throwandrethrowin a catch block?
`throw` always creates a new stack trace; `rethrow` preserves the original stack trace.Use
rethrowwhen you want to log or partially handle an exception but still let it propagate with its original stack trace intact for debugging.
如果捕获的错误和抛弃的错误不一样会发生什么
Consider this code:
try { riskyOperation(); } on FormatException catch (e) { print(e); }. What happens ifriskyOperation()throws anHttpException?
The `HttpException` propagates up, uncaught by this try/catch.The
onclause filters by exception type. SinceHttpExceptionisn't aFormatException, it bypasses this catch block entirely.
加上一点枚举和拓展(Extension)Extend your app with enums and extensions
You will improve the user experience of your Dartpedia CLI application by adding color to the output and improving text formatting.
使用增强枚举实现 终端ANSI色彩支持 Enhance the console color enum
First, add color to the console output. The
ConsoleColorenum will include RGB values and methods for applying colors to text.
- Create the
command_runner/lib/src/console.dartfile.- Add the following code to define the
ConsoleColorenum:
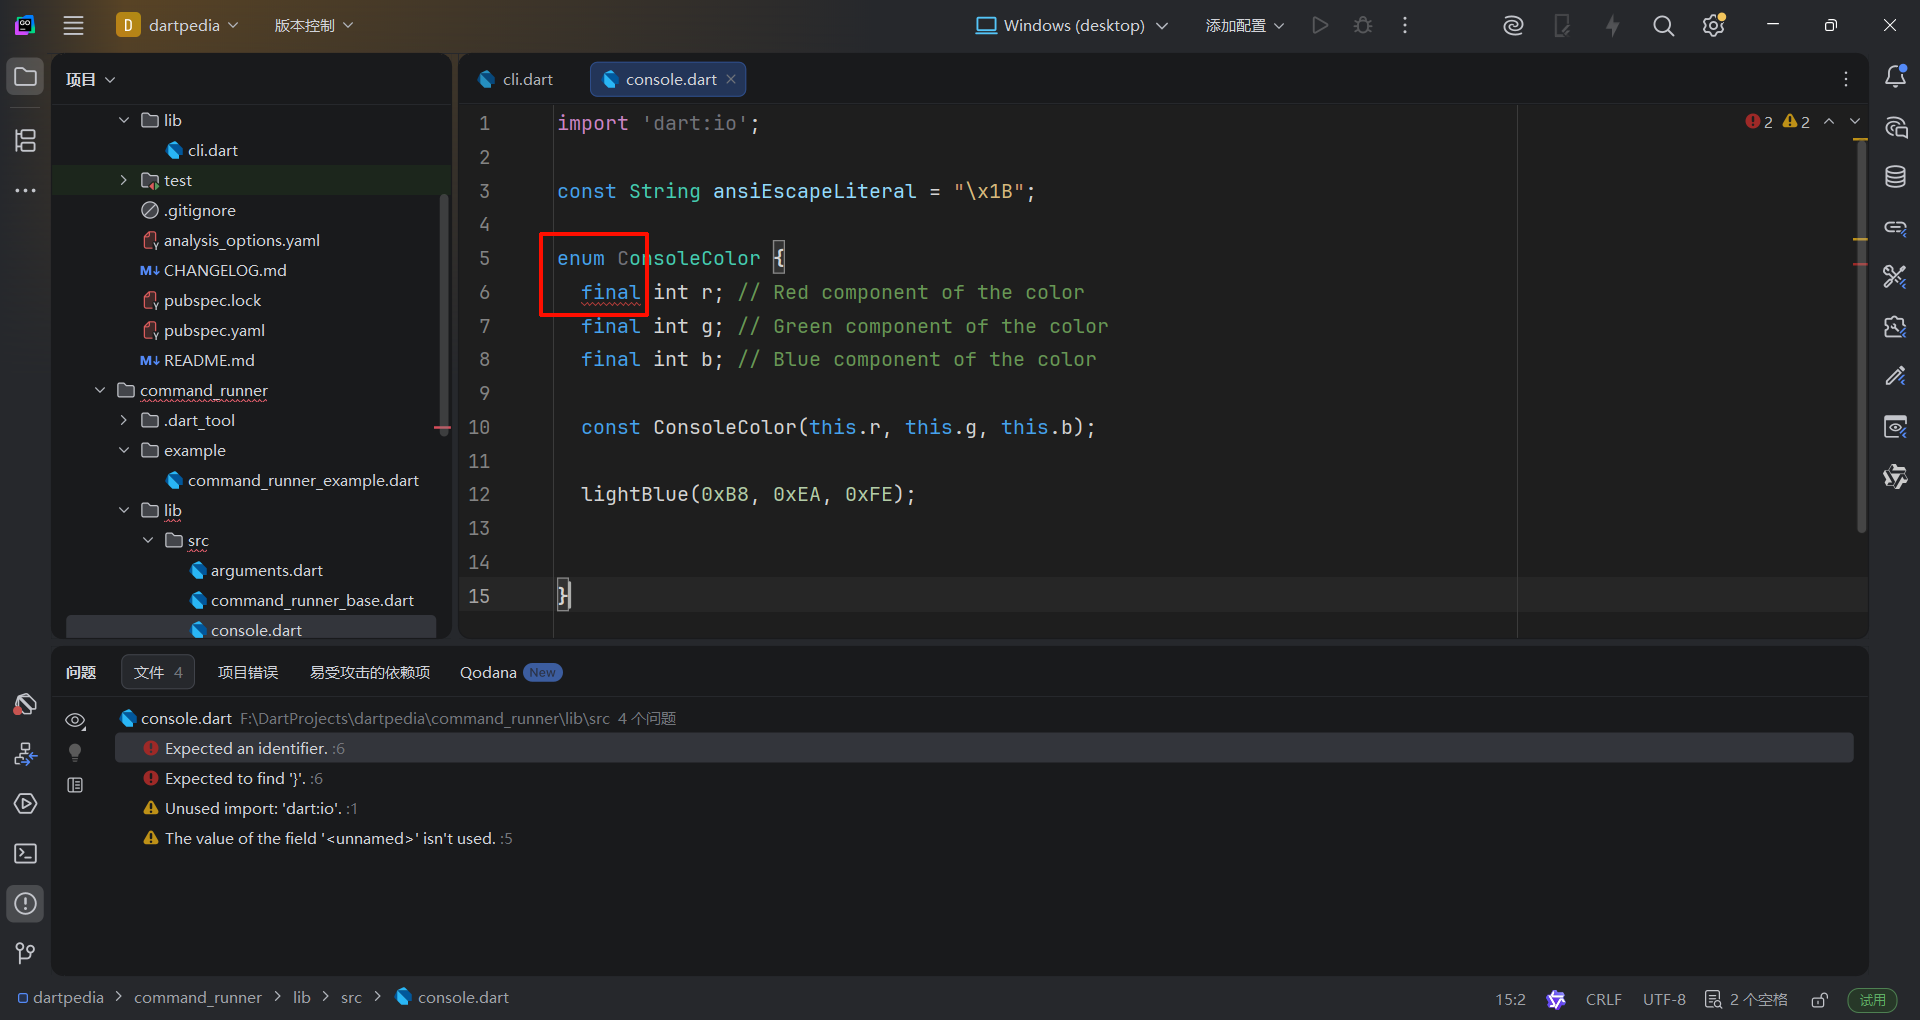
import 'dart:io';

const String ansiEscapeLiteral = '\x1B';

/// Splits strings on `\n` characters, then writes each line to the
/// console. [duration] defines how many milliseconds there will be
/// between each line print.
Future<void> write(String text, {int duration = 50}) async {
  final List<String> lines = text.split('\n');
  for (final String l in lines) {
    await _delayedPrint('$l \n', duration: duration);
  }
}

/// Prints line-by-line
Future<void> _delayedPrint(String text, {int duration = 0}) async {
  return Future<void>.delayed(
    Duration(milliseconds: duration),
    () => stdout.write(text),
  );
}

/// RGB formatted colors that are used to style input
///
/// All colors from Dart's brand styleguide
///
/// As a demo, only includes colors this program cares about.
/// If you want to use more colors, add them here.
enum ConsoleColor {
  /// Sky blue - #b8eafe
  lightBlue(184, 234, 254),

  /// Accent colors from Dart's brand guidelines
  /// Warm red - #F25D50
  red(242, 93, 80),

  /// Light yellow - #F9F8C4
  yellow(249, 248, 196),

  /// Light grey, good for text, #F8F9FA
  grey(240, 240, 240),

  ///
  white(255, 255, 255);

  const ConsoleColor(this.r, this.g, this.b);

  final int r;
  final int g;
  final int b;
}
This enum defines a set of console colors with their corresponding RGB values. Each color is a constant instance of the
ConsoleColorenum.
注
Dart原生没有Char类型
语法分析器在干嘛?
无题
// Dart的Enhanced Enum增强型枚举, 要求枚举值在前面, 而具体的字段和构造函数则放在后面
enum ConsoleColor {
  lightBlue(0xB8, 0xEA, 0xFE),
  red(0xF2, 0x5D, 0x50),
  yellow(0xF9, 0xF8, 0xC4),
  grey(0xF8, 0xF9, 0xFA), // 枚举值之间用逗号分隔
  white(0xFF, 0xFF, 0xFF); // 最后一个枚举值用分号结束; 编译器默认第一个分号前面的都是枚举值, 之后的都是property

  final int r; // Red component of the color
  final int g; // Green component of the color
  final int b; // Blue component of the color

  const ConsoleColor(this.r, this.g, this.b);
}
Enhanced Enum 增强枚举 Dart 2.17+
Dart also allows enum declarations to declare classes with fields, methods, and const constructors which are limited to a fixed number of known constant instances.
To declare an enhanced enum, follow a syntax similar to normal classes, but with a few extra requirements:
- Instance variables must be
final, including those added by mixins. - All generative constructors must be constant.
- Factory constructors can only return one of the fixed, known enum instances.
- No other class can be extended as
Enumis automatically extended. - There cannot be overrides for
index,hashCode, the equality operator==. - A member named
valuescannot be declared in an enum, as it would conflict with the automatically generated staticvaluesgetter. - All instances of the enum must be declared in the beginning of the declaration, and there must be at least one instance declared.
Instance methods in an enhanced enum can use this to reference the current enum value.
Here is an example that declares an enhanced enum with multiple instances, instance variables, getters, and an implemented interface:
enum Vehicle implements Comparable<Vehicle> {
  car(tires: 4, passengers: 5, carbonPerKilometer: 400),
  bus(tires: 6, passengers: 50, carbonPerKilometer: 800),
  bicycle(tires: 2, passengers: 1, carbonPerKilometer: 0);

  const Vehicle({
    required this.tires,
    required this.passengers,
    required this.carbonPerKilometer,
  });

  final int tires;
  final int passengers;
  final int carbonPerKilometer;

  int get carbonFootprint => (carbonPerKilometer / passengers).round();

  bool get isTwoWheeled => this == Vehicle.bicycle;

  @override
  int compareTo(Vehicle other) => carbonFootprint - other.carbonFootprint;
}
- Add methods to the
ConsoleColorenum for applying colors to text:
enum ConsoleColor {
  // ... (existing enum values)

  const ConsoleColor(this.r, this.g, this.b);

  final int r;
  final int g;
  final int b;

  /// Change text color for all future output (until reset)
  /// ```dart
  /// print('hello'); // prints in terminal default color
  /// print(ConsoleColor.red.enableForeground);
  /// print('hello'); // prints in red color
  /// ```
  String get enableForeground => '$ansiEscapeLiteral[38;2;$r;$g;${b}m';

  /// Change text color for all future output (until reset)
  /// ```dart
  /// print('hello'); // prints in terminal default color
  /// print(ConsoleColor.red.enableBackground);
  /// print('hello'); // prints with red background color
  /// ```
  String get enableBackground => '$ansiEscapeLiteral[48;2;$r;$g;${b}m';

  /// Reset text and background color to terminal defaults
  static String get reset => '$ansiEscapeLiteral[0m';

  /// Sets text color for the input
  String applyForeground(String text) {
    return '$ansiEscapeLiteral[38;2;$r;$g;${b}m$text$reset';
  }

  /// Sets background color and then resets the color change
  String applyBackground(String text) {
    return '$ansiEscapeLiteral[48;2;$r;$g;${b}m$text$ansiEscapeLiteral[0m';
  }
}
These methods use ANSI escape codes to apply foreground and background colors to text. The
applyForegroundandapplyBackgroundmethods return a string with the ANSI escape codes applied.
编写字符串扩展函数 Create a String extension
Next, create an extension on the
Stringclass to add utility methods for applying console colors and formatting text.
- Add the following code to the
command_runner/lib/src/console.dartfile:
// Add this code to the bottom of the file
extension TextRenderUtils on String {
  String get errorText => ConsoleColor.red.applyForeground(this);
  String get instructionText => ConsoleColor.yellow.applyForeground(this);
  String get titleText => ConsoleColor.lightBlue.applyForeground(this);

  List<String> splitLinesByLength(int length) {
    final List<String> words = split(' '); // 省略了this
    final List<String> output = <String>[];
    final StringBuffer strBuffer = StringBuffer();
    for (int i = 0; i < words.length; i++) {
      final String word = words[i];
      if (strBuffer.length + word.length <= length) {
        strBuffer.write(word.trim());
        if (strBuffer.length + 1 <= length) {
          strBuffer.write(' ');
        }
      }
      // If the next word surpasses length, start the next line
      if (i + 1 < words.length &&
          words[i + 1].length + strBuffer.length + 1 > length) {
        output.add(strBuffer.toString().trim());
        strBuffer.clear();
      }
    }

    // Add left overs
    output.add(strBuffer.toString().trim());
    return output;
  }
}
his code defines an extension called
TextRenderUtilson theStringclass. It adds three getter methods for applying console colors:errorText,instructionText, andtitleText. It also adds a method for splitting a string into lines of a specified length calledsplitLinesByLength.
更新command_runner包 Update the command_runner package
Update the
command_runnerpackage to exportconsole.dart.
- Open
command_runner/lib/command_runner.dartand add the following line:
library;

export 'src/arguments.dart';
export 'src/command_runner_base.dart';
export 'src/exceptions.dart';
export 'src/help_command.dart';
export 'src/console.dart'; // Add this line

// TODO: Export any libraries intended for clients of this package.
实现有色终端打印 Implement colorful echo command
Finally, implement an example command to test the print. It's good practice to implement example usage of a package in Dart for developers that will use your package. This example creates a command that makes console output colorful.
- Open the
example/command_runner_example.dartfile.- Replace the contents of the file with the following code:
import 'dart:async';

import 'package:command_runner/command_runner.dart';

class PrettyEcho extends Command {
  PrettyEcho() {
    addFlag(
      'blue-only',
      abbr: 'b',
      help: 'When true, the echoed text will all be blue.',
    );
  }

  @override
  String get name => 'echo';

  @override
  bool get requiresArgument => true;

  @override
  String get description => 'Print input, but colorful.';

  @override
  String? get help =>
      'echos a String provided as an argument with ANSI coloring,';

  @override
  String? get valueHelp => 'STRING';

  @override
  FutureOr<String> run(ArgResults arg) {
    if (arg.commandArg == null) {
      throw ArgumentException(
        'This argument requires one positional argument',
        name,
      );
    }

    List<String> prettyWords = [];
    var words = arg.commandArg!.split(' ');
    for (var i = 0; i < words.length; i++) {
      var word = words[i];
      switch (i % 3) {
        case 0:
          prettyWords.add(word.titleText);
        case 1:
          prettyWords.add(word.instructionText);
        case 2:
          prettyWords.add(word.errorText);
      }
    }

    return prettyWords.join(' ');
  }
}

void main(List<String> arguments) {
  final runner = CommandRunner()..addCommand(PrettyEcho());

  runner.run(arguments);
}
This code defines a
PrettyEchocommand that extends theCommandclass. It takes a string as an argument and applies different colors to each word based on its position in the string. Therunmethod uses thetitleText,instructionText, anderrorTextgetter methods from theTextRenderUtilsextension to apply the colors.

官方教程里没有blueText,所以我补了一个
- Navigate to
/dartpedia/command_runnerand run the following command:
dart run example/command_runner_example.dart echo "hello world goodbye"
课后练习
Dart增强枚举是什么
What is an enhanced enum in Dart?
An enum that can have methods and properties.Enhanced enums allow you to add fields, constructors, and methods to enum types, making them much more powerful than simple enumerations.
Dart扩展函数是什么
What is a Dart extension?
A way to add new methods to existing classes.Extensions allow you to add new functionality to existing types without modifying them or creating subclasses.
如何为已有的类增加方法但不修改类本身的定义
You want to add a
capitalizeWords()method toString, but you can't modify theStringclass. What's the best approach?
Create an extension on `String` that adds the method.Extensions let you add methods to existing types. You can then call
'hello world'.capitalizeWords()as ifcapitalizeWordswas built intoString.
美化你的CLI程序 Polish you CLI app
You will polish the
command_runnerpackage to make it more robust and user-friendly.
优化HelpCommand输出 Implement the HelpCommand output
Enhance the
HelpCommandto provide more detailed usage information, including options and their descriptions. This will make it easier for users to understand how to use your CLI application.
- Open the
command_runner/lib/src/help_command.dartfile.- Add imports for
console.dartandexceptions.dartat the top of the file. You need these to use the color extensions and to throw anArgumentException.
import 'dart:async';

import 'package:command_runner/command_runner.dart';

import 'console.dart';
import 'exceptions.dart';
- Replace the existing
runmethod with the following. This new version uses aStringBufferto efficiently build the help string and includes logic to handle verbose output.
@override
FutureOr<String> run(ArgResults args) async {
  final buffer = StringBuffer();
  buffer.writeln(runner.usage.titleText);

  if (args.flag('verbose')) {
    for (var cmd in runner.commands) {
      buffer.write(_renderCommandVerbose(cmd));
    }

    return buffer.toString();
  }

  if (args.hasOption('command')) {
    var (:option, :input) = args.getOption('command');

    var cmd = runner.commands.firstWhere(
      (command) => command.name == input,
      orElse: () {
        throw ArgumentException(
          'Input ${args.commandArg} is not a known command.',
        );
      },
    );

    return _renderCommandVerbose(cmd);
  }

  // Verbose is false and no arg was passed in, so print basic usage.
  for (var command in runner.commands) {
    buffer.writeln(command.usage);
  }

  return buffer.toString();
}
StringBufferis a Dart class that allows you to efficiently build strings. It's more performant than using the+operator, especially when performing many concatenations inside a loop.
- Add the
_renderCommandVerboseprivate helper method to theHelpCommandclass. This method formats the detailed output for a single command.
String _renderCommandVerbose(Command cmd) {
  final indent = ' ' * 10;
  final buffer = StringBuffer();
  buffer.writeln(cmd.usage.instructionText); //abbr, name: description
  buffer.writeln('$indent ${cmd.help}');
  if (cmd.valueHelp != null) {
    buffer.writeln(
      '$indent [Argument] Required? ${cmd.requiresArgument}, Type: ${cmd.valueHelp}, Default: ${cmd.defaultValue ?? 'none'}',
    );
  }
  buffer.writeln('$indent Options:');
  for (var option in cmd.options) {
    buffer.writeln('$indent ${option.usage}');
  }
  return buffer.toString();
}添加onOutput回调函数 Add an onOutput callback
Next, add an
onOutputargument to theCommandRunnerto allow for flexible output handling.
- Open the
command_runner/lib/src/command_runner_base.dartfile.- Add the
onOutputargument to theCommandRunnerconstructor, and add the correspondingonOutputmember to the class.
class CommandRunner {
  CommandRunner({this.onOutput, this.onError});

  /// If not null, this method is used to handle output. Useful if you want to
  /// execute code before the output is printed to the console, or if you
  /// want to do something other than print output the console.
  /// If null, the onInput method will [print] the output.
  FutureOr<void> Function(String)? onOutput;

  FutureOr<void> Function(Object)? onError;

  // ... rest of the class
}
- Update the
runmethod to use theonOutputargument.
  Future<void> run(List<String> input) async {
    try {
      final ArgResults results = parse(input);
      if (results.command != null) {
        Object? output = await results.command!.run(results);
        if (onOutput != null) {
          await onOutput!(output.toString());
        } else {
          print(output.toString());
        }
      }
    } on Exception catch (exception) {
      if (onError != null) {
        onError!(exception);
      } else {
        rethrow;
      }
    }
  }
This updates the
runmethod to use theonOutputfunction if it is provided, otherwise it defaults to printing to the console.
onOutput函数现在可能会覆盖默认print打印的行为
可以压成一行:
(onOutput ?? print).call(output.toString());onOutput不为空就调用onOutput的call方法- 为空就调用
print的call方法
使用onOutput回调函数 Use the onOutput callback
Finally, update your main application to use the new
onOutputfeature.
- Open the
cli/bin/cli.dartfile.- Update the
mainfunction to pass theonOutputfunction to theCommandRunner. You will also need to add an import forconsole.dartto make thewritefunction available.
import 'package:command_runner/command_runner.dart';

const version = '0.0.1';

void main(List<String> arguments) {
  var commandRunner = CommandRunner(
    onOutput: (String output) async {
      await write(output);
    },
    onError: (Object error) {
      if (error is Error) {
        throw error;
      }
      if (error is Exception) {
        print(error);
      }
    },
  )..addCommand(HelpCommand());
  commandRunner.run(arguments);
}
测试代码变更 Test the changes
Test the improved
HelpCommandand theonOutputcallback.
- Open your terminal and navigate to the
clidirectory.- Run the command
dart run bin/cli.dart help --verbose.
You should see detailed usage information for thehelpcommand, printed using the customwritefunction.
dart run bin/cli.dart help --verbose
课后练习
StringBuffer有什么用
What is the purpose of the
StringBufferclass in Dart?
To efficiently build strings by appending multiple parts.
StringBufferprovides efficient string concatenation by avoiding the creation of intermediate string objects during multiple, successive appends.
代码里的onOutput是做什么用的
What does the
onOutputargument in theCommandRunnerclass allow you to do?
Customize the output handling of a command.
onOutputlets you define custom behavior for command output, such as formatting, logging, or writing to different destinations.
处理JSON数据 Work with JSON data
In this chapter, you'll create Dart classes to represent the JSON data returned by the Wikipedia API. This will allow you to easily access and use the data in your application.
新起一个Wikipedia包 Create the Wikipedia package
First, create a new Dart package to house the data models.
- Navigate to the root directory of your project (
/dartpedia).- Run the following command in your terminal:
dart create wikipediaThis command creates a new directory named
wikipediawith the basic structure of a Dart package. You should now see a new folderwikipediain your project root, alongsidecliandcommand_runner.
配置Dart工作区 Configure a Dart workspace
Dart workspaces allow you to manage multiple related packages within a single project, simplifying dependency management and local development. Now that you're adding your third package, it's a good time to configure your project to use a Dart workspace.
Dart工作区允许你在单个项目中管理多个相关的包(packages ),简化依赖管理和本地开发工作流。既然你已经有三个包了,现在不妨试一下在你的项目中创建Dart工作区吧
- Create the root
pubspec.yamlfile.
Navigate to the root directory of your project (/dartpedia) and create a new file namedpubspec.yamlwith the following content:
name: _
publish_to: none

environment:
  sdk: ^3.8.1 # IMPORTANT: Adjust this to match your Dart SDK version or a compatible range
workspace:
  - cli
  - command_runner
  - wikipedia
- Add workspace resolution to sub-packages.
For each of your sub-packages (cli,command_runner, andwikipedia), open their respectivepubspec.yamlfiles and addresolution: workspacetopubspec.yaml. This tells Dart to resolve dependencies within the workspace.
- For
cli/pubspec.yaml:
# ... (existing content) ...
name: cli
description: A sample command-line application.
version: 1.0.0
resolution: workspace # Add this line
# ... (existing content) ...
- For
command_runner/pubspec.yaml:
# ... (existing content) ...
name: command_runner
description: A starting point for Dart libraries or applications.
version: 1.0.0
resolution: workspace # Add this line
# ... (existing content) ...
- For
wikipedia/pubspec.yaml:
# ... (existing content) ...
name: wikipedia
description: A sample command-line application.
version: 1.0.0
resolution: workspace # Add this line
# ... (existing content) ...创建Summary类 Create the Summary class
The Wikipedia API returns a JSON object containing a summary of an article. Let's create a Dart class to represent this summary.
- Create the directory
wikipedia/lib/src/model.
mkdir -p wikipedia/lib/src/model
- Create the file
wikipedia/lib/src/model/summary.dart.- Add the following code to
wikipedia/lib/src/model/summary.dart:
import 'title_set.dart';

class Summary {
  /// Returns a new [Summary] instance.
  Summary({
    required this.titles,
    required this.pageid,
    required this.extract,
    required this.extractHtml,
    required this.lang,
    required this.dir,
    this.url,
    this.description,
  });

  ///
  TitlesSet titles;

  /// The page ID
  int pageid;

  /// First several sentences of an article in plain text
  String extract;

  /// First several sentences of an article in simple HTML format
  String extractHtml;

  /// Url to the article on Wikipedia
  String? url;

  /// The page language code
  String lang;

  /// The page language direction code
  String dir;

  /// Wikidata description for the page
  String? description;

  /// Returns a new [Summary] instance
  static Summary fromJson(Map<String, Object?> json) {
    return switch (json) {
      {
        'titles': final Map<String, Object?> titles,
        'pageid': final int pageid,
        'extract': final String extract,
        'extract_html': final String extractHtml,
        'lang': final String lang,
        'dir': final String dir,
        'content_urls': {
          'desktop': {'page': final String url},
          'mobile': {'page': String _},
        },
        'description': final String description,
      } =>
        Summary(
          titles: TitlesSet.fromJson(titles),
          pageid: pageid,
          extract: extract,
          extractHtml: extractHtml,
          lang: lang,
          dir: dir,
          url: url,
          description: description,
        ),
      {
        'titles': final Map<String, Object?> titles,
        'pageid': final int pageid,
        'extract': final String extract,
        'extract_html': final String extractHtml,
        'lang': final String lang,
        'dir': final String dir,
        'content_urls': {
          'desktop': {'page': final String url},
          'mobile': {'page': String _},
        },
      } =>
        Summary(
          titles: TitlesSet.fromJson(titles),
          pageid: pageid,
          extract: extract,
          extractHtml: extractHtml,
          lang: lang,
          dir: dir,
          url: url,
        ),
      _ => throw FormatException('Could not deserialize Summary, json=$json'),
    };
  }

  @override
  String toString() =>
      'Summary['
      'titles=$titles, '
      'pageid=$pageid, '
      'extract=$extract, '
      'extractHtml=$extractHtml, '
      'lang=$lang, '
      'dir=$dir, '
      'description=$description'
      ']';
}
This code defines a
Summaryclass with properties that correspond to the fields in the JSON response from the Wikipedia API. ThefromJsonmethod uses pattern matching to extract the data from the JSON object and create a newSummaryinstance. ThetoStringmethod provides a convenient way to print the contents of theSummaryobject. Note that theTitlesSetclass is used in theSummaryclass, so you'll need to create that next.
创建 TitleSet 类 Create the TitleSet class
The
Summaryclass uses aTitlesSetclass to represent the title information. Let's create that class now.
- Create the file
wikipedia/lib/src/model/title_set.dart.- Add the following code to
wikipedia/lib/src/model/title_set.dart:
class TitlesSet {
  /// Returns a new [TitlesSet] instance.
  TitlesSet({
    required this.canonical,
    required this.normalized,
    required this.display,
  });

  /// the DB key (non-prefixed), e.g. may have _ instead of spaces,
  /// best for making request URIs, still requires Percent-encoding
  String canonical;

  /// the normalized title (https://www.mediawiki.org/wiki/API:Query#Example_2:_Title_normalization),
  /// e.g. may have spaces instead of _
  String normalized;

  /// the title as it should be displayed to the user
  String display;

  /// Returns a new [TitlesSet] instance and imports its values from a JSON map
  static TitlesSet fromJson(Map<String, Object?> json) {
    if (json case {
      'canonical': final String canonical,
      'normalized': final String normalized,
      'display': final String display,
    }) {
      return TitlesSet(
        canonical: canonical,
        normalized: normalized,
        display: display,
      );
    }
    throw FormatException('Could not deserialize TitleSet, json=$json');
  }

  @override
  String toString() =>
      'TitlesSet['
      'canonical=$canonical, '
      'normalized=$normalized, '
      'display=$display'
      ']';
}
This code defines a
TitlesSetclass with properties that correspond to the title information in the JSON response from the Wikipedia API. ThefromJsonmethod uses pattern matching to extract the data from the JSON object and create a newTitlesSetinstance. ThetoStringmethod provides a convenient way to print the contents of theTitlesSetobject.
创建 Article 类 Create the Article class
The Wikipedia API also returns a list of articles in a search result. Let's create a Dart class to represent an article.
- Create the file
wikipedia/lib/src/model/article.dart.- Add the following code to
wikipedia/lib/src/model/article.dart:
class Article {
  Article({required this.title, required this.extract});

  final String title;
  final String extract;

  static List<Article> listFromJson(Map<String, Object?> json) {
    final List<Article> articles = <Article>[];
    if (json case {'query': {'pages': final Map<String, Object?> pages}}) {
      for (final MapEntry<String, Object?>(:Object? value) in pages.entries) {
        if (value case {
          'title': final String title,
          'extract': final String extract,
        }) {
          articles.add(Article(title: title, extract: extract));
        }
      }
      return articles;
    }
    throw FormatException('Could not deserialize Article, json=$json');
  }

  Map<String, Object?> toJson() => <String, Object?>{
    'title': title,
    'extract': extract,
  };

  @override
  String toString() {
    return 'Article{title: $title, extract: $extract}';
  }
}
This code defines an
Articleclass with properties for the title and extract of an article. ThelistFromJsonmethod uses pattern matching to extract the data from the JSON object and create a list ofArticleinstances. ThetoJsonmethod converts theArticleobject back into a JSON object. ThetoStringmethod provides a convenient way to print the contents of theArticleobject.
提示
在教程里字段较少的情况下,用模式匹配(自动JSON解析)会灵活方便一些
大型项目中多用json_serializable插件
创建 SearchResult 类 Create the SearchResult class
Finally, let's create a class to represent the search results from the Wikipedia API.
- Create the file
wikipedia/lib/src/model/search_results.dart.- Add the following code to
wikipedia/lib/src/model/search_results.dart:
class SearchResult {
  SearchResult({required this.title, required this.url});
  final String title;
  final String url;
}

class SearchResults {
  SearchResults(this.results, {this.searchTerm});
  final List<SearchResult> results;
  final String? searchTerm;

  static SearchResults fromJson(List<Object?> json) {
    final List<SearchResult> results = <SearchResult>[];
    if (json case [
      String searchTerm,
      Iterable articleTitles,
      Iterable _,
      Iterable urls,
    ]) {
      final List titlesList = articleTitles.toList();
      final List urlList = urls.toList();
      for (int i = 0; i < articleTitles.length; i++) {
        results.add(SearchResult(title: titlesList[i], url: urlList[i]));
      }
      return SearchResults(results, searchTerm: searchTerm);
    }
    throw FormatException('Could not deserialize SearchResults, json=$json');
  }

  @override
  String toString() {
    final StringBuffer pretty = StringBuffer();
    for (final SearchResult result in results) {
      pretty.write('${result.url} \n');
    }
    return '\nSearchResults for $searchTerm: \n$pretty';
  }
}
This code defines a
SearchResultsclass with a list ofSearchResultobjects and a search term. ThefromJsonmethod uses pattern matching to extract the data from the JSON object and create a newSearchResultsinstance. ThetoStringmethod provides a convenient way to print the contents of theSearchResultsobject.
At this point, you've created data models to represent JSON structures. There's nothing to test at this point. You'll add that application logic in the upcoming sections, which will enable you to test how data is deserialized from the Wikipedia API.
课后练习
什么是JSON
What is JSON?
A lightweight data-interchange format that's easy for humans to read and write and easy for machines to parse and generate.JSON (JavaScript Object Notation) is a text-based format for representing structured data. It's widely used for data exchange between applications, especially in web APIs.
{"name": "Dart"} 应该解析成什么Dart类型
When
jsonDecodeparses a JSON object like{"name": "Dart"}, what Dart type does it return?
A `Map<String, dynamic>` representing the JSON object.JSON objects become
Map<String, dynamic>, where keys are strings and values can be any JSON-compatible type.
为什么Summary类要使用基于fromJson的构造函数,而不是直接使用来自jsonDecode的原始Map
Why create a
Summaryclass with afromJsonfactory constructor instead of just using the rawMapfromjsonDecode?
Type safety, IDE autocompletion, and clearer code that documents the expected data structure.A class gives you compile-time type checking, autocomplete for properties, and self-documenting code.
summary.titleis clearer thanmap['title'].