Golang Gin框架(五):配置加载、热部署、验证码
参数验证(补充)
国际化翻译验证消息
【AI】配置加载第三方库(总览)
王者之选 (All-in-One King)
1. Viper
如果需要一个能“统治”所有配置的终极解决方案,那么 Viper 就是不二之选。它是 Go 后端社区的事实标准 (de facto standard)。
一句话概括:一个功能极其全面的配置解决方案,可以处理几乎所有你能想到的配置来源和格式。
支持的格式:
- 文件: YAML, JSON, TOML, INI, HCL
- 环境变量 (env): 可以完美地集成并覆盖文件配置。
- 远程 K/V 存储: Consul, etcd (需要扩展)
- 命令行标志 (pflag)
- ...等等
核心优势:
- 优先级覆盖:这是 Viper 最强大的地方。你可以定义一套优先级规则,比如:
命令行参数>环境变量>配置文件>默认值。这使得应用的配置在不同环境(开发、测试、生产)下极其灵活。 - 热加载 (Live Reload):可以监控配置文件的变化,并在不重启应用的情况下自动重新加载配置。
- 强类型读取:可以将配置直接反序列化(Unmarshal)到一个 Go
struct中,代码更整洁、更安全。 - 设置默认值:可以为配置项提供一个默认值,避免配置缺失导致程序崩溃。
- 优先级覆盖:这是 Viper 最强大的地方。你可以定义一套优先级规则,比如:
代码示例:
config.yaml文件:server: port: 8080 database: host: "localhost" user: "root" password: "password"main.go文件:package main import ( "fmt" "github.com/fsnotify/fsnotify" "github.com/spf13/viper" ) func main() { // 1. 设置默认值 viper.SetDefault("server.port", 8000) // 2. 设置配置文件 viper.SetConfigName("config") // 文件名 (不带扩展名) viper.SetConfigType("yaml") // 文件类型 viper.AddConfigPath(".") // 在当前目录查找 // 3. 读取配置文件 if err := viper.ReadInConfig(); err != nil { panic(fmt.Errorf("Fatal error config file: %s \n", err)) } // 4. 绑定环境变量 (可选但推荐) // 允许你用 `DATABASE_HOST=db.prod.com go run .` 来覆盖配置 viper.SetEnvPrefix("MYAPP") // e.g. MYAPP_DATABASE_HOST viper.AutomaticEnv() // 5. 监控配置文件变化 (可选) viper.OnConfigChange(func(e fsnotify.Event) { fmt.Println("Config file changed:", e.Name) }) viper.WatchConfig() // 6. 读取配置 port := viper.GetInt("server.port") dbHost := viper.GetString("database.host") fmt.Printf("Server running on port: %d\n", port) fmt.Printf("Database host: %s\n", dbHost) // ... 启动你的 Gin 服务 ... // router.Run(fmt.Sprintf(":%d", port)) }
轻量级专精 (Focused Specialists)
2. godotenv
一句话概括:只做一件事,并且做得很好——从
.env文件加载环境变量。核心优势:极简、无依赖。它不解析任何复杂的格式,只是读取
.env文件,然后调用 Go 标准库的os.Setenv把它们设置到当前进程的环境变量中。适用场景:
- 在本地开发环境中,优雅地管理密码、API Key 等敏感信息,而不用把它们提交到 Git。
- 作为 Viper 的完美搭档。你可以用
godotenv先加载.env,然后 Viper 的AutomaticEnv()就可以无缝地读取到这些变量了。
代码示例:
.env文件:DB_PASSWORD="a_super_secret_password"main.go文件:import ( "fmt" "github.com/joho/godotenv" "os" ) func main() { // 在程序最开始加载 .env 文件 err := godotenv.Load() if err != nil { fmt.Println("Error loading .env file, using system env vars") } // 现在就可以用标准库来读取了 password := os.Getenv("DB_PASSWORD") fmt.Println("DB Password:", password) }
3. kelseyhightower/envconfig
一句话概括:将环境变量直接反序列化到
struct中,非常 Go-idiomatic。核心优势:代码极其整洁。你只需要定义一个带
envconfig标签的struct,它会自动帮你完成所有的加载、类型转换和校验。适用场景:云原生应用(如跑在 Kubernetes 中),这类应用的所有配置都通过环境变量来传递。
代码示例:
package main

import (
	"fmt"
	"github.com/kelseyhightower/envconfig"
	"log"
)

type Specification struct {
	Debug      bool   `envconfig:"DEBUG"`
	Port       int    `envconfig:"PORT" default:"8080"`
	DBPassword string `envconfig:"DB_PASSWORD" required:"true"`
}

func main() {
	var s Specification
	// 确保你已经设置了环境变量: export DB_PASSWORD="secret"
	err := envconfig.Process("myapp", &s)
	if err != nil {
		log.Fatal(err.Error())
	}
	fmt.Printf("Port: %d\n", s.Port)
	fmt.Printf("DB Password set: %v\n", s.DBPassword != "")
}
总结与建议
| 库 | 核心特性 | 支持格式 | 最适合的场景 |
|---|---|---|---|
| Viper | 全功能、优先级覆盖 | 几乎所有 (YAML, JSON, INI, env...) | 需要灵活配置、多环境部署的绝大多数生产级应用 |
| godotenv | 极简、只加载 .env | env | 本地开发,管理敏感信息,与 Viper 等库搭配使用 |
| envconfig | 环境变量直达 struct | env | 云原生、容器化应用,完全依赖环境变量进行配置 |
给开发者的学习路径建议:
- 首选
Viper:对于购物网站这类标准后端应用,直接学习并使用Viper是最明智的选择。它能一步到位,让你学会生产级的配置管理方式。 - 搭配
godotenv:在你的main函数最开始,先用godotenv.Load()加载.env文件,然后再初始化 Viper。这样你就可以在.env文件里存放本地数据库密码等信息,同时享受 Viper 的强大功能,这是非常经典的组合。 - 了解
envconfig的思想:当你未来接触更多云原生和 Docker/K8s 部署时,envconfig这种完全依赖环境变量的“十二要素应用”思想会变得非常重要。
配置加载:熟悉Viper
安装和导入
go get github.com/spf13/viper
import "github.com/spf13/viper"
读取配置文件并访问
Viper支持下面这些日志格式:
- JSON
- TOML
- YAML
- INI
- env
- Java Propeties
一个Viper实例只能加载一个配置文件,但是可以自己起一个viper实例:
x := viper.New()
y := viper.New()

x.SetDefault("ContentDir", "content")
y.SetDefault("ContentDir", "foobar")
**可以添加多个搜索路径 **
下面是用Viper搜索并加载配置文件的示例:
package main
import (
"log"
"path/filepath"
"github.com/spf13/viper")
func main() {
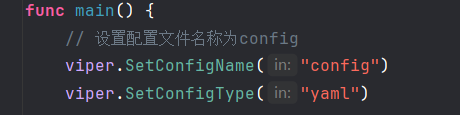
// 设置配置文件名称为config
viper.SetConfigName("config")
viper.SetConfigType("yaml") // 没必要加, 因为Viper大部分情况下都会根据拓展名使用合适的序列化方法
// 添加配置文件搜索路径
configSearchPath, _ := filepath.Abs("./config/")
viper.AddConfigPath(configSearchPath)
// 可以一次性添加多个搜索路径
viper.AddConfigPath(".")
// 找到并读取配置文件
err := viper.ReadInConfig()
if err != nil {
log.Fatal(err)
}
}viper.ReadInConfig的调用链如下:
viper.ReadInConfigv.getConfigFile、afero.ReadFile与v.unmarshalReaderafero.ReadFile
1.fs.Open与f.Stat
因此,该方法会报的一个错就是fileLookupError,可以使用下面的示例来捕获这一报错(官方示例):
var fileLookupError viper.FileLookupError
if err := viper.ReadInConfig(); err != nil {
    if errors.As(err, &fileLookupError) {
        // 显式表明没有指定搜索路径 (比如说
        // 在使用 `viper.SetConfigFile` 时) 或没有在任何指定目录下搜索到配置文件
        //  (比如在使用 `viper.AddConfigPath` 时)
    } else {
        // 报错了但是不知道报的什么错
    }
}

// 成功找到并解析配置文件
相关信息
Viper 1.6+ 允许手动设置配置文件拓展名(使用viper.SetConfigType),这对于一些没有拓展名或非常规拓展名的文件来说很有帮助(比如Shell配置.bashrc)
目前的版本是viper 1.21.0
读取配置文件后使用viper.Get()方法获得配置参数:(相对地使用viper.Set方法更新配置)
serverConfig := viper.Get("server")
fmt.Printf("读取服务器配置得到: %#v\n", serverConfig)
// map[string]interface {}{"host":"0.0.0.0", "port":8080}
// 访问次级配置
serverPort := viper.Get("server.port")
fmt.Printf("读取服务器端口配置得到: %#v\n", serverConfig)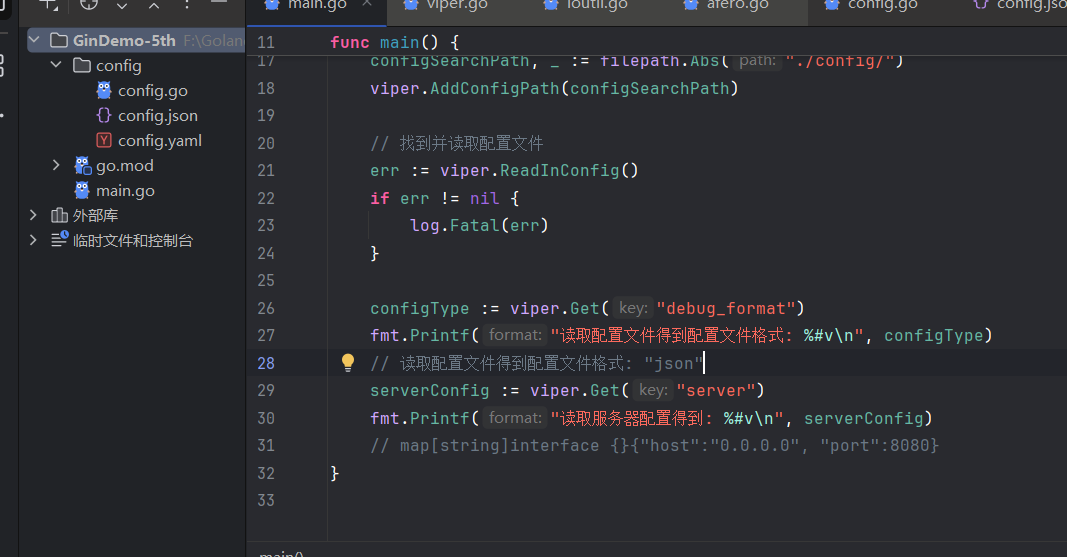
注意到 config/目录下同时存在JSON和YAML配置文件,那么viper会加载哪个呢?
显然是JSON……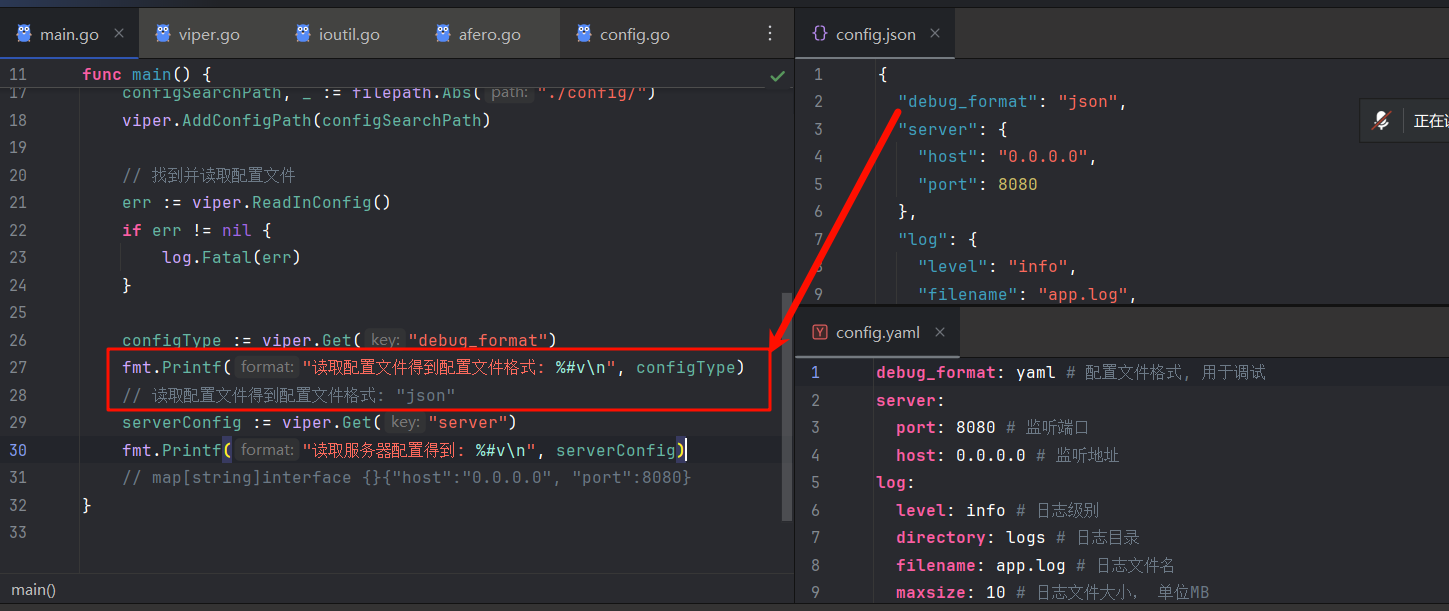
即便显式设置配置类型为yaml也不行……只有移除JSON文件(或在文件资源管理器中修改文件拓展名)后才能加载到YAML配置
写入配置文件
Viper知道你可能会有将运行时保存配置修改的需求,因此贴心地提供了配置持久化的方法:
// Writes current config to the path set by `AddConfigPath` and `SetConfigName`
viper.WriteConfig()
// 无参写入,文件名由前面对viper.AddConfigPath和viper.SetConfigName的调用决定
viper.SafeWriteConfig() // Like the above, but will error if the config file exists
// Safe的意思就是不会覆盖文件

// Writes current config to a specific place
viper.WriteConfigAs("/path/to/my/.config")

// Will error since it has already been written
viper.SafeWriteConfigAs("/path/to/my/.config")

viper.SafeWriteConfigAs("/path/to/my/.other_config")
现在让我们来试一下: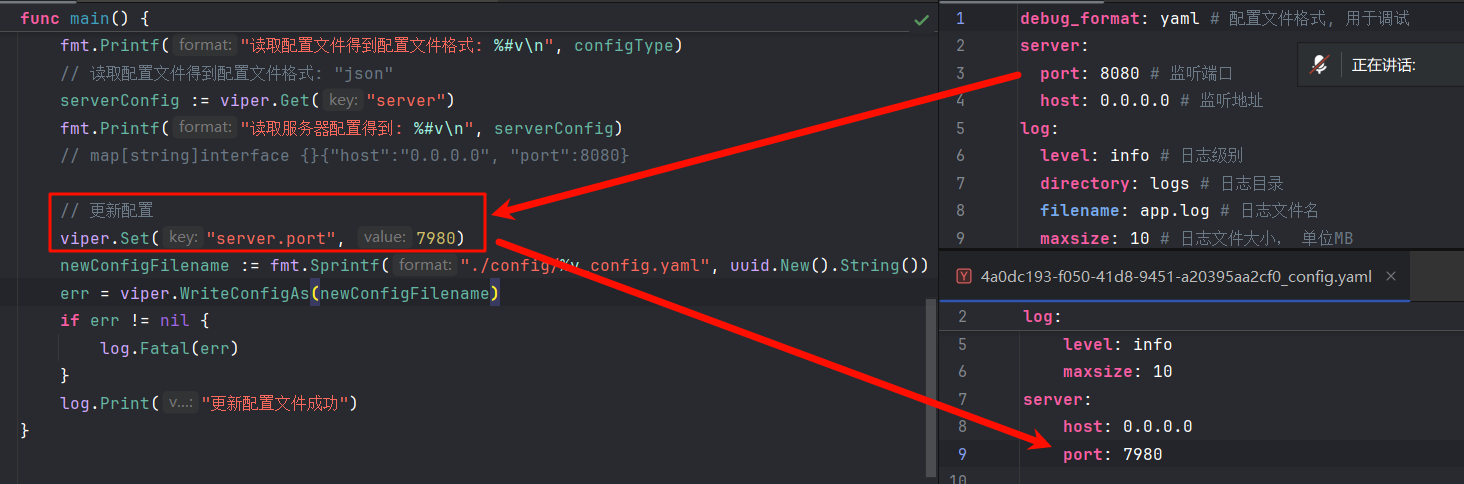
UUID是用来防止覆盖原始配置的
配置热更新
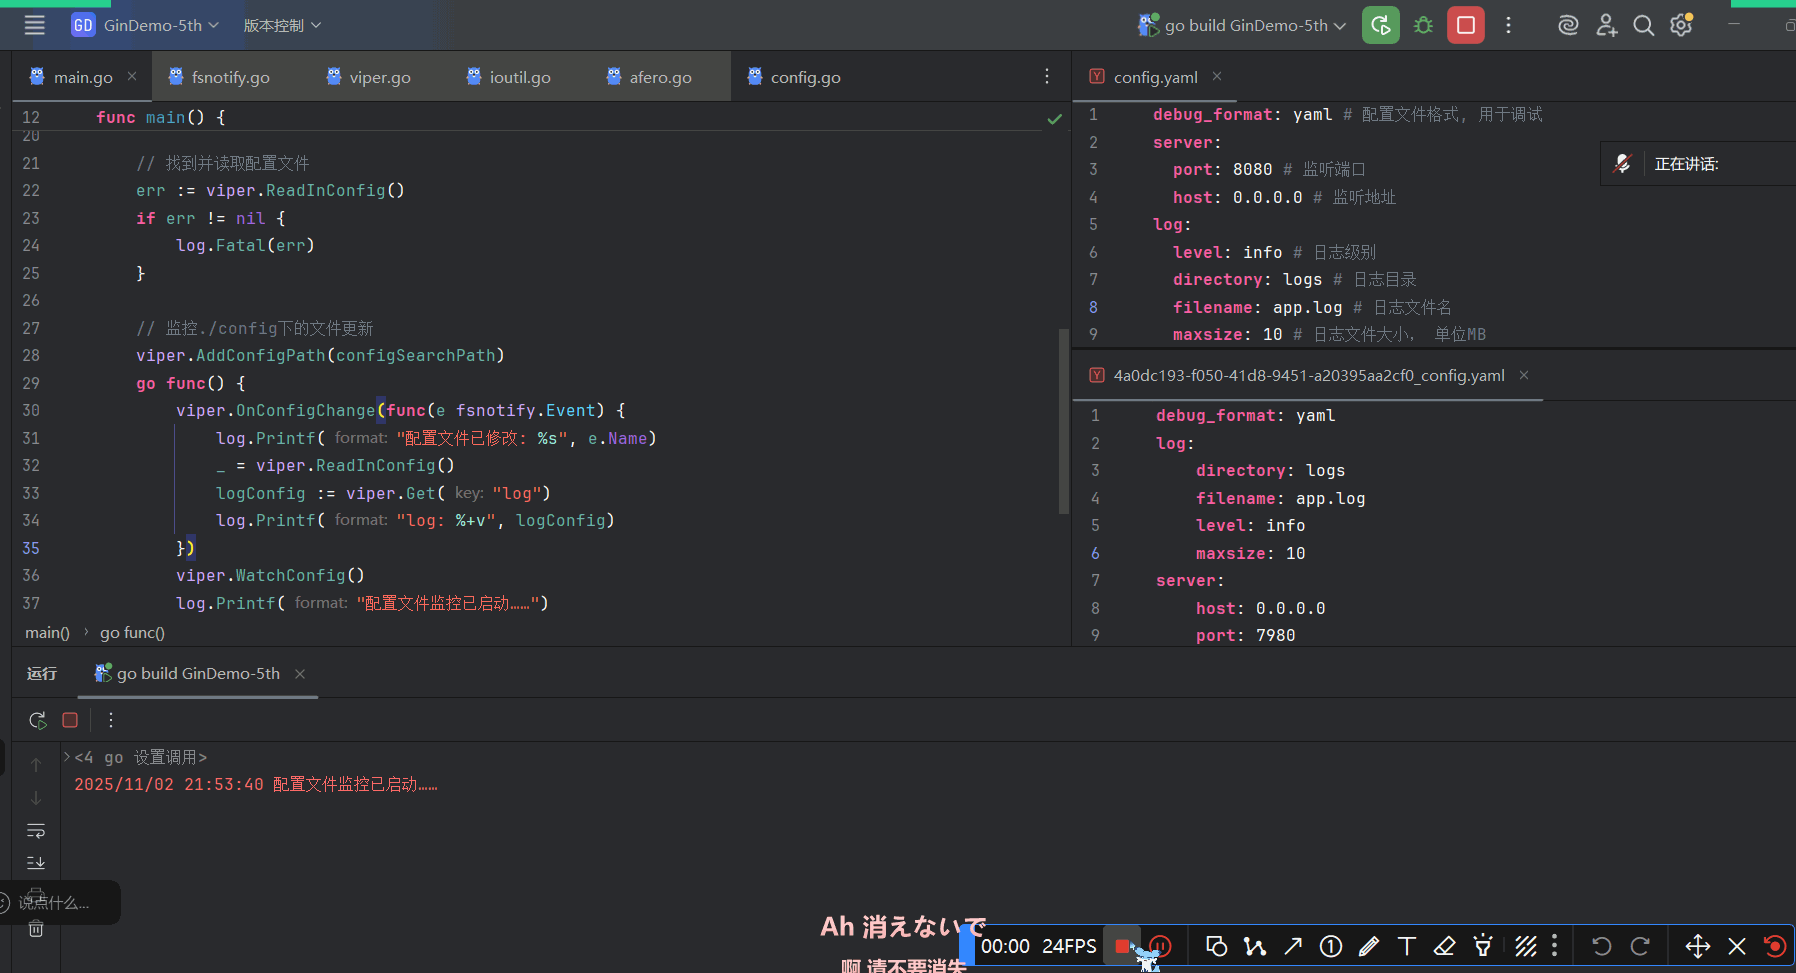
Viper只需几行代码就可以实现对配置目录的监控:
// 在调用`WatchConfig()`前必须将你所有想要监控的目录加上去
viper.AddConfigPath("$HOME/.appname")

viper.OnConfigChange(func(e fsnotify.Event) {
	fmt.Println("Config file changed:", e.Name)
})

viper.WatchConfig()fsnotify.Event结构体包含两个字段:- string类型 发生修改的文件的文件名
- Op类型 表示文件操作的位掩码
这里只演示.Name字段大概是因为另一个字段的格式化不好写
必要时要手动保存
从io.Reader中读取配置
viper.SetConfigType("yaml") // 必须手动设置配置格式了

var yamlExample = []byte(`
hacker: true
hobbies:
- skateboarding
- snowboarding
- go
name: steve
`)

viper.ReadConfig(bytes.NewBuffer(yamlExample))

viper.Get("name") // "steve"
默认配置
出色的配置系统应该支持默认配置,以防遗漏配置项
viper.SetDefault("ContentDir", "content")
viper.SetDefault("LayoutDir", "layouts")
viper.SetDefault("Taxonomies", map[string]string{"tag": "tags", "category": "categories"})
嗯,还能设置复合类型,就挺好的
配置覆盖/配置二次设置
viper.Set("verbose", true)
viper.Set("host.port", 5899) // Set an embedded key- 如果已存在配置项,就使用
Set - 不存在配置项,就用
SetDefautl - 完事记得
SafeWriteAsConfig
配置别名
Viper允许用多个键引用同一个值
viper.RegisterAlias("loud", "Verbose")

viper.Set("verbose", true) // Same result as next line
viper.Set("loud", true)    // Same result as prior line

viper.GetBool("loud")    // true
viper.GetBool("verbose") // true
适配环境变量
// Tells Viper to use this prefix when reading environment variables
viper.SetEnvPrefix("spf")

// Viper will look for "SPF_ID", automatically uppercasing the prefix and key
viper.BindEnv("id")

// Alternatively, we can search for any environment variable prefixed and load
// them in
viper.AutomaticEnv()

os.Setenv("SPF_ID", "13")

id := viper.Get("id") // 13- 环境变量这里是大小写敏感的——其他配置源都是大小写不敏感的
- 默认情况下空环境变量会被忽略,除非启用
AllowEmptyEnv - Viper不会缓存环境变量,所以每次使用环境变量都会重新从环境中读取
SetEnvKeyReplacer和EnvKeyReplacer允许用户修改环境变量的键,非常适合用来把从其他配置源读取到的驼_峰_变_量_名SCREAMING_SNAKE_CASE改成短-横-线-全-拼-命-名
适配flag
没看懂,留个传送门先
云端配置存储 && 加密存储
从Viper实例中访问配置
对于下面的map结构:
{
    "datastore": {
        "metric": {
            "host": "127.0.0.1",
            "ports": [
                5799,
                6029
            ]
        }
    }
}
可以这样访问:
metricInDatastore := viper.Get("datatstore.metric")
// 如果需要特定类型的配置,可以:
GetString("datastore.metric.host") // "127.0.0.1"
GetInt("host.ports.1") // 6029- 访问不存在的键会返回零值
- 请使用
IsSet检查指定键是否存在
{
    "datastore.metric.host": "0.0.0.0",
    "datastore": {
        "metric": {
            "host": "127.0.0.1"
        }
    }
}
另外,对于这样拥有同名键与次级键的配置,Viper会优先访问拥有次级键结构的配置:
GetString("datastore.metric.host") // "0.0.0.0"配置子集
应该是为了兼容配置文件中的列表格式:
cache:
  cache1:
    item-size: 64
    max-items: 100
  cache2:
    item-size: 80
    max-items: 200
func NewCache(v *Viper) *Cache {
return &Cache{
ItemSize: v.GetInt("item-size"),
MaxItems: v.GetInt("max-items"),
}
}
cache1Config := viper.Sub("cache.cache1")
if cache1Config == nil {
// Sub returns nil if the key cannot be found
panic("cache configuration not found")
}
cache1 := NewCache(cache1Config)反序列化
type config struct {
	Port int
	Name string
	PathMap string `mapstructure:"path_map"`
}

var C config

err := viper.Unmarshal(&C)
if err != nil {
	t.Fatalf("unable to decode into struct, %v", err)
}
对应的配置可为:(以YAML格式为例)
config: # 不可以为conf, 必须统一
	port: 8080
	name: http
pathMap: web.xml如果配置键包含点号.,那么需要手动修改变量名分隔符(delimeter):
v := viper.NewWithOptions(viper.KeyDelimiter("::"))

v.SetDefault("chart::values", map[string]any{
	"ingress": map[string]any{
		"annotations": map[string]any{
			"traefik.frontend.rule.type":                 "PathPrefix",
			"traefik.ingress.kubernetes.io/ssl-redirect": "true",
		},
	},
})

type config struct {
	Chart struct{
		Values map[string]any
	}
}

var C config

v.Unmarshal(&C)
可以反序列化为嵌套结构体:
/*
Example config:

module:
    enabled: true
    token: 89h3f98hbwf987h3f98wenf89ehf
*/
type config struct {
	Module struct {
		Enabled bool

		moduleConfig `mapstructure:",squash"`
	}
}

type moduleConfig struct {
	Token string
}

var C config

err := viper.Unmarshal(&C)
if err != nil {
	t.Fatalf("unable to decode into struct, %v", err)
}
序列化为字符串
You may need to marshal all the settings held in Viper into a string. You can use your favorite format's marshaller with the config returned by
AllSettings.
import (
	yaml "go.yaml.in/yaml/v3"
)

func yamlStringSettings() string {
	c := viper.AllSettings()
	bs, err := yaml.Marshal(c)
	if err != nil {
		log.Fatalf("unable to marshal config to YAML: %v", err)
	}
	return string(bs)
}
日志
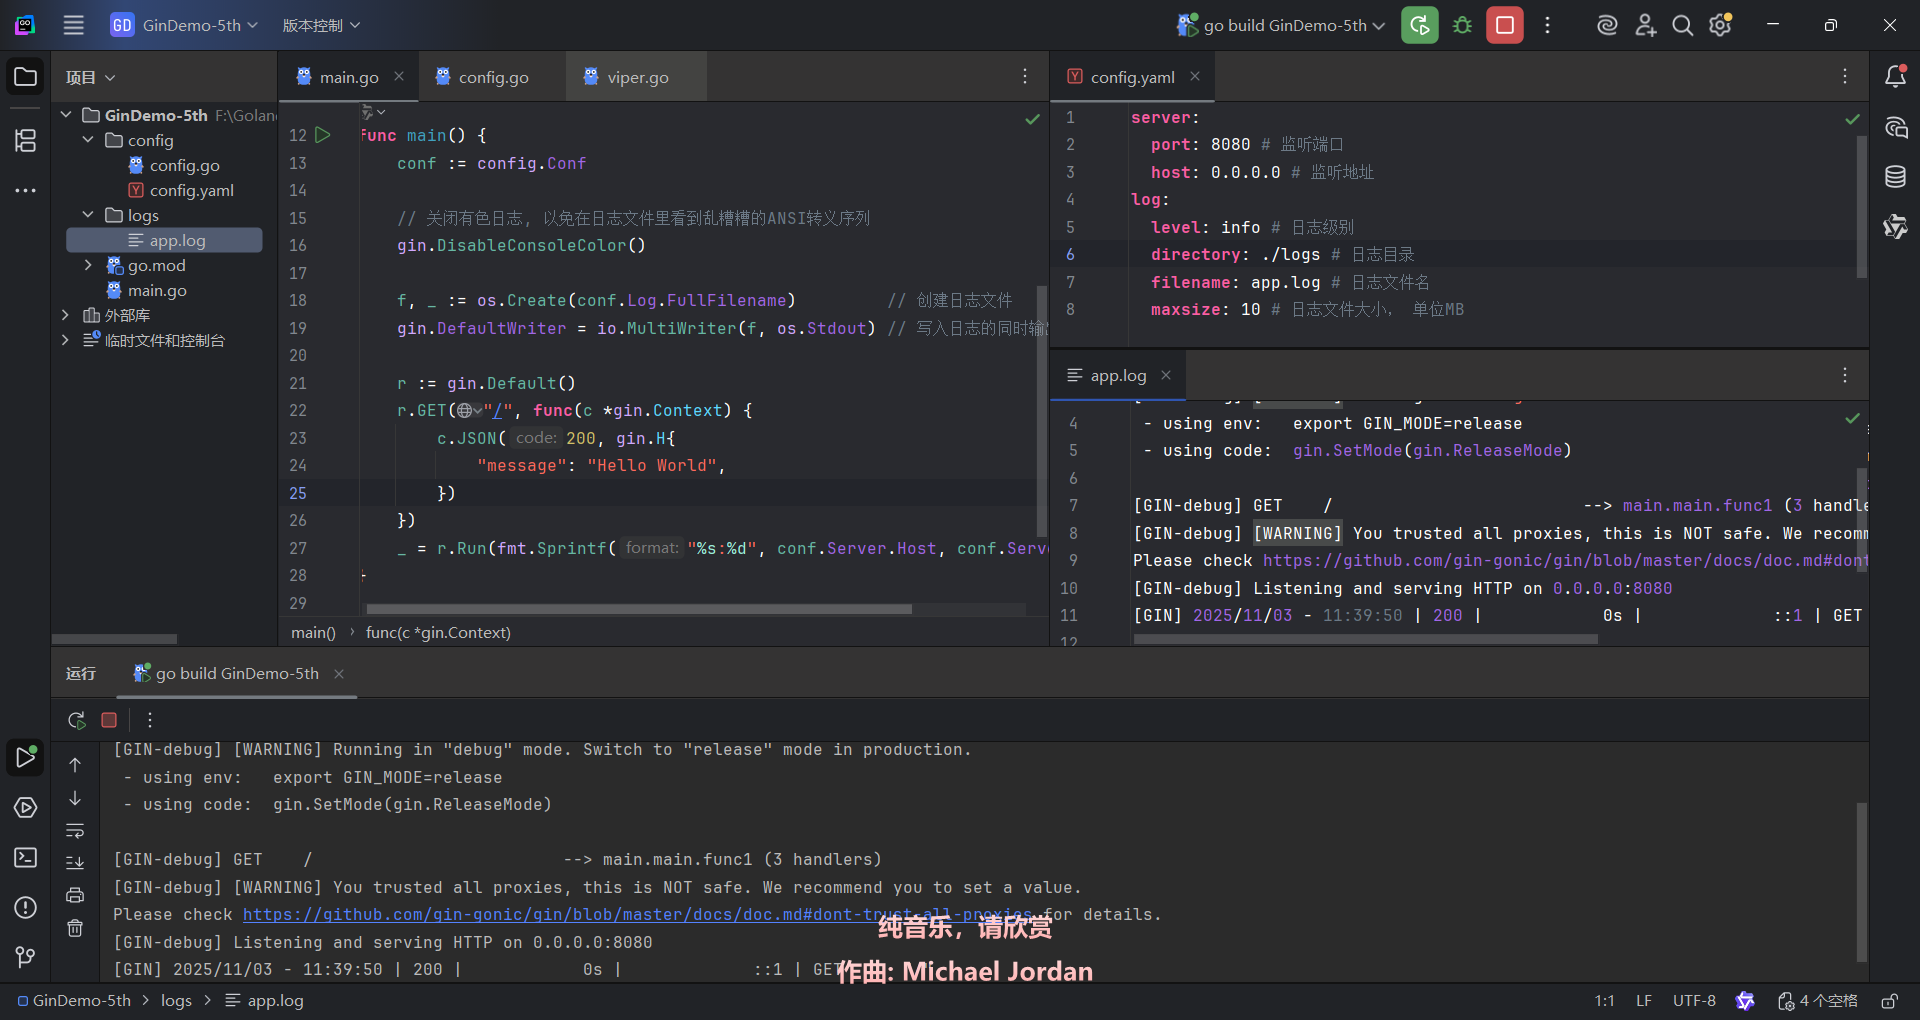
使用io标准库实现日志持久化
func main() {
    conf := config.Conf

    // 关闭有色日志, 以免在日志文件里看到乱糟糟的ANSI转义序列
    gin.DisableConsoleColor()

    f, _ := os.Create(conf.Log.FullFilename)         // 创建日志文件
    gin.DefaultWriter = io.MultiWriter(f, os.Stdout) // 写入日志的同时输出到控制台

    r := gin.Default()
    r.GET("/", func(c *gin.Context) {
       c.JSON(200, gin.H{
          "message": "Hello World",
       })
    })
    _ = r.Run(fmt.Sprintf("%s:%d", conf.Server.Host, conf.Server.Port))
}conf.Log.FullFilename的值为string{"logs/app.log"}
Air热部署
安装
go install github.com/air-verse/air@latest- 【2025年11月3日 12:38:48】最新版air要求Go 1.25.3
使用
# 优先在当前路径查找 `.air.toml` 后缀的文件,如果没有找到,则使用默认的
air -c .air.toml
也可以自定义配置:
# 将具有默认设置的 `.air.toml` 配置文件初始化到当前目录
air init
# 在这之后,你只需执行 `air` 命令,无需额外参数,它就能使用 `.air.toml` 文件中的配置了
air- air本身是跨平台的
- Topgoer文档给出的配置文件示例适用于UNIX
- 官方用
air init初始化的配置文件才适用于不同平台(一个平台一种配置)
Air还支持给构建好的EXE传递指令和参数,不过这就是后话了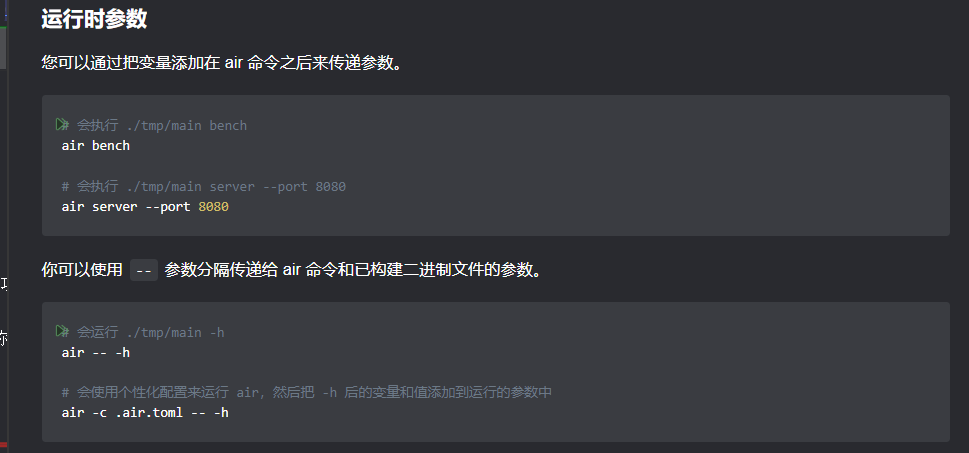
运行效果如下:
Gin验证码
github.com/dchest/captcha库
go get -v -u "github.com/dchest/captcha"
import "github.com/dchest/captcha"
文档里的代码怕是文档作者没有好好跑过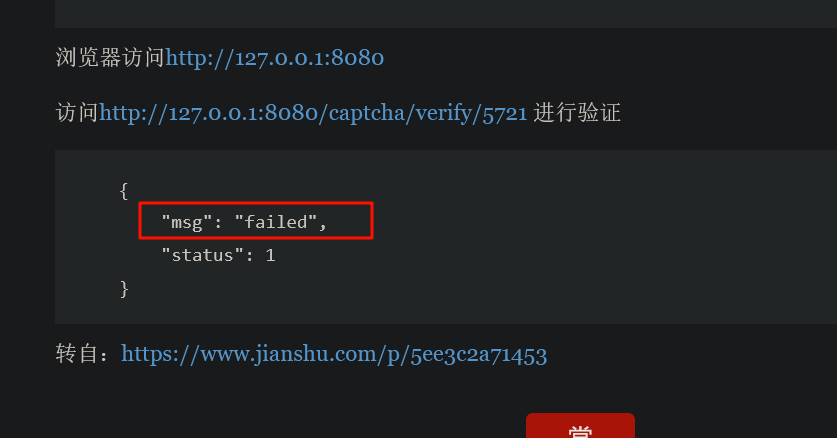
绷不住了自己都测不出来……